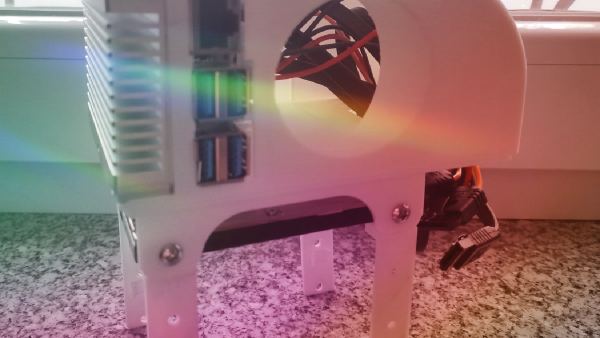
My father needs a new laptop. And I have one sitting around, that I abuse as a server. A waste of resources and not ideal use case for a laptop. So I took my homeserver, put a ssd inside and gave him a new destiny. My father is happy but I have no cloud anymore 😔. To reserve energy I chose to run the laptop only when I send a wake on lan package to it. Which is a tedious process if you want to just upload some pictures. My new homeserver has to run full time, be powerful enough to run some docker containers and be energy conservative. I started my research and found the NanoPi M4 which in combination with a SATA hat seems to be an ideal solution. The NanoPi is running on a Rock64 pro which is more powerful than the Raspberry Pi 4. There are different 3D printable NAS cases for the NanoPi with SATA hat. I am using this one, which has a very small form factor, but only supports 2.5" disks. Not ideal for a NAS, but it will work. You can opt to other setups that support 3.5" drives. Just have a look at thingivers.com.
Shopping List
High efficiency power supply. 40Watt are plenty enough for this setup. The supply will not get warm even if the NAS is under heavy load. NanoPi M4 – 4GB, SATA HAT for NanoPi M4, NanoPi M4 Heat Sink. Sata Y-splitter cable. 32GB micro SD or bigger – choose your favorite manufacturer. Maybe add a two pin fan or some fancy OLED display to the mix, if you wanna go crazy. Put it all together and flash OpenMediaVault on the card. Lets boot it und start configuring OMV.
Basics & Docker setup
The first thing to do in OMV4 is to change the default ports to 90 and 446, which should be done anyway.
Create a shared folder named appdata and use SMB/CIFS (Samba) to create a share for your computer. There you can create additional folders. Note user rights!
Then create a folder named MariaDB and a folder named NextcloudConfig and a folder named NextcloudData in the folder appdata.
Download the respective docker images in OMV4:
- linuxserver/mariadb
- linuxserver/nextcloud
- ebspace/armhf-phpmyadmin
- linuxserver/letsencrypt
- linuxserver/duckdns
All dockers Restart: always
Install MariaDB image
- Container name:
mariadb - Bridge Mode: Host Port: 3306 | Exposed Port: 3306
Add environment variables
PUID - 1000 (may differ - please check in the terminal with: id USERNAME )
PGID - 100
TZ - Europe/Berlin
MYSQL_ROOT_PASSWORD - A root password for the database (remember it forever)
Add Volumes and Bind mounts
- Host Path:
/sharedfolders/appdata/MariaDB - Container Path:
/configSave
Install the phpmyadmin image
- Container name:
mariadb - Network mode: host
Add environment variables
PMA_HOST - IP address of your server
PMA_PORT - 3306
Save
Create database
Open in your browser: https://ip-addresse-of-server/phpmyadmin
Login with:
Username: root
Password: The one you should remember forever
Then click on NEW at the top left
Create new database - enter database name nextcloud and press Create
Then search the database in the lower field and click “Check rights”. (Do not click on the database itself, but only on “Check rights” on the right)
Click on NEW - Add user
Username: a username that you like
Host: %
Password: A password of your choice
Password: repeat the password
Scroll down and click OK
Done. phpMyAdmin can be closed and we go back to OMV4-Docker
Install the Nextcloud image:
Container name: nextcloud
- Bridge Mode: Host Port: 447
- Exposed Port: 443
Add environment variables
PUID - 1000
PGID - 100
Add Volumes and Bind mounts
Host Path:
/sharedfolders/appdata/NextcloudConfigContainer Path:
/configHost Path:
/sharedfolders/appdata/NextcloudDataContainer Path:
/data
Save
Open in your browser: https://ip-addresse-of-server:447
Create admin account
Username: admin
Password: A password of your choice
Data directory `/data`
Memory & Database Select `MySQL/MariaDB`
Database user: The user name you created earlier at phpmyadmin (not root!)
Password: The corresponding password
Database name: nextcloud
Localhost: ip-address-of-the-server:3306
Start
All done with the docker setup. Don’t forget to adjust your MEMORY_MAX_LIMIT in php.ini of the nextcloud config.
Fan service
Let’s add a small systemd service for our fan and let the machine do it’s thing.
#!/bin/bash
FANON=false

echo 150 > /sys/class/gpio/export
# this will create /sys/class/gpio/gpio150
echo out > /sys/class/gpio/gpio150/direction

while true; do
    TEMP=$( cat /sys/class/thermal/thermal_zone0/temp )
    if [ $TEMP -gt 55000 ]; then
        echo 1 > /sys/class/gpio/gpio150/value
        FANON=true
    elif [ $TEMP -le 45000 ] && $FANON; then
        echo 0 > /sys/class/gpio/gpio150/value
        FANON=false
    fi
    sleep 1
done;